Last week, the first Autodesk Forma hackathon was organized.
Charles and I had already met some folks from the Forma team during DevCon 2023 in Munich, and then again during AU in Las Vegas. We were encouraged to test Forma as developers and were asked to try creating extensions and provide feedback on the SDK.
Unfortunately, we were very busy with our daily work towards the end of the year and did not have time to delve into this product.
This event provided a real opportunity for us to dedicate time to Forma with the assistance of the engineering team.
The event kicked off at 9 am, and we were then all invited to pitch our ideas. Ours was quite simple – “Make Augmented Reality from Forma”.
After some discussions with familiar Autodesk faces, we began our work.
A few days before the event, I started reading the documentation and discovered from one of the examples that we were able to get triangles from the elements. That was our starting point, but after some discussions with the engineering team, they convinced us to use the Forma API – which allowed us to access the data without using an extension – and thus without opening the Forma web page.
We decided to give it a try and began making API requests to extract Forma data. Unfortunately, we quickly realized that this API was still new and needed some tips/hacks to obtain certain values.
Our biggest challenge, however, was not only competing against great teams but also against time. While we could accomplish a lot in two days, with introductions, breaks, discussions, setup, and preparation of materials for the presentation, we realistically only had about 5-10 hours of actual coding time.
Discovering the API, parsing responses, and creating recursive functions is not very complicated but can be quite time-consuming. In this case, we were not sure if we would be able to achieve our goals by the end.
Returning to our initial approach, we quickly set up a Forma extension, and with a few lines of code, we were able to retrieve the geometry of our buildings. With a basic websocket server, we could then send this data to other clients.
Next, we created a fresh Unity project – our game engine of choice for easily prototyping and developing AR apps – and added a websocket client to receive our data.
Unity is very useful for creating augmented reality apps. With the help of the ARFoundation package, we only needed to drag the necessary components into the scene to have an AR app that we could deploy on our iPad.
Now came the trickiest part: model placement. Usually, we work with markers or detected plane intersections to establish a real-world origin. However, for this example, we decided to use geolocation (the accuracy should be sufficient for this use case).
This part involved two different steps:
Converting the GPS coordinates of the model to placed and the device to Cartesian coordinates.
Finding the true north of the device to orient the model.
Because we were working inside the building, we did not have easy access to the outdoors, and our GPS data were not perfect. Also, due to the time limit, we streamlined this process a bit and assumed the orientation, for example, by placing the device in the right position at launch.
In any case, our presentation and work impressed the judges, and we were one of the three winners (which was amusing for us as we weren’t sure if we would even compete!).
We concluded the hackathon with a drink and took the opportunity to have further discussions.
Thank you to all the Forma team for organizing this event. We were very pleased to participate in this hackathon and would like to express special thanks Daniel and Håvard.
We were also happy to see Kean, Petr and Denis. I took the opportunity to chat with them about some APS-related questions.
Our return flight was on Thursday evening, so we had some time to visit Oslo.
Olso bay view from Akershus fortress
We found a boat leaving just 10 minutes later for a 2-hour cruise, which was a great opportunity to see Oslo’s surroundings and gain a different perspective.
As avid lovers of French cuisine, we were a little disappointed to limit ourselves to Norwegian food such as pizza and sushi, so we sought out a local meal. We found a great restaurant focused on seafood.
Delicious fish and vegetables meal
It was already time to fly back to Nantes and return to our projects.
Working on Extended Reality since 2017, it would be a shame to miss one of the best European event about XR.
The last time I participated in this event was in 2019 and it was held in a different place which was located in the center of Laval and was not very easily accessible. Since 2021, they have been using the pretty new Espace Mayenne which is really great for this kind of event.
I started my day with a quick tour to get a big picture of the whole place. My main expectation was to discover new devices as there is such a gap with my 2018’s headsets. It was really great to see how these VR devices were improved – more comfortable, very lightweight, without cable or PC connection. But the real improvement is the video passthrough capability and tracking that allow now to do impressive AR experience with opaque headset. Accurate tracking, a good image frame rate and a nice stability are what we expect from those.
I have been following for many months the development of the Lynx R1 which is a new French manufacturer. There was a lot of people waiting to try this new mixed reality headset, but I managed to test it. Even though it is very comfortable, I was a little disappointed about the video passthrough fluidity which was a little bit laggy. I know that this kind of event is not the best condition for this kind of experience and software development can be really optimized but compared to others devices that I had the chance to try, it still needs some work to improve and become a strong competitor.
I visited myxed booth to see some friends and had the opportunity to try the Varjo XR3 with a nice airplane configurator experience. The quality and hand tracking is so impressive, but as it is VR PC, it is hard to compare with standalone devices.
Trying the Varjo XR3 at another booth with a different experience confirmed that this headset can be very good on specific use cases.
Microsoft was hosting some of its Hololens 2 partners who were presenting their solutions for industry. I was familiar with these applications as I also developed a complete HL2 solution for one of our customers.
It’s very impressive that despite people criticizing HL for its weaknesses – such as the limited field of view – it is still very competitive with actual devices, even if HL2 has been released 3 years ago !
There was so many people trying to test the haptic gloves from Haptx which allow you to add pretty convincing feedback in the hands and forearms to the VR experience. Nevertheless, it requires a huge backpack equipment plus the gloves which can reduce the applications of this purpose.
Manus was presenting their high precision tracking gloves. The Quantum Metagloves rely on sensors rather than vision to perform hand tracking, resulting in a unique experience. But I think that the required time to put on and calibrate the gloves will limit applications.
Interactive model synchronized with the associated digital twin
I finished my day with the excellent RectoVerso exhibition, which combines art with XR technologies.
Attending the Laval Virtual was a great experience once again. It was exciting to see how much the XR industry has evolved since my last visit, and to try out the latest VR and AR devices. I enjoyed meeting customers and professionals from the XR community, and learning about their innovative projects and applications. The event provided valuable insights and inspiration for my own work in XR.
I am already looking forward to next year’s event, where I hope to see even more cutting-edge technologies and applications.
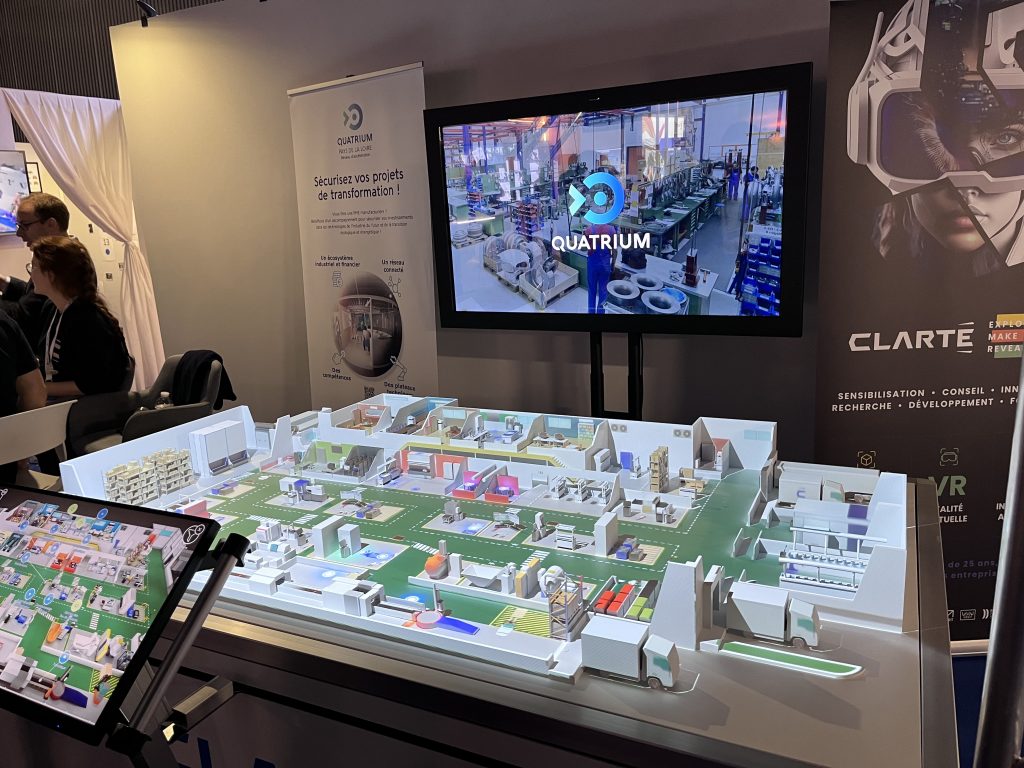
Every year, BIM World event is kind of unmissable. 2h hours of train make this travel pretty easy – even with the social movements of the day, which did not affect us by the way.
Since 2019, BIM World is held at Paris Expo – Porte de Versailles which is the biggest exhibiting centre in France and recognizable by his central ring of screens.
After a complete tour of the show to see most of the exhibitors, we went to the Autodesk booth. We were happy to discuss with some “Autodeskers” about APS and products news.
We attended some great presentations around the show.
After this first day, we were invited to the “Soirée de l’Excellence” organized by Autodesk. It took place in a beautiful room near the BIMWorld, where we had a fantastic view on Paris at night.
We attended to four talks. Starting with the future of technologies in AEC, where we had a great preview of the way AI can be more integrated into current software. Followed by two different cases about train tracks construction and train station building.
Then, for the second time of the day we followed the vision of XR presentation, from the current VR products to the new developments on their roadmap.
We spent our second day discussing with some acquaintances and customers. As usual, for us the greatest value added of this event is to strengthen relationships with people we already know or have not met in person.
The focus was made on digital twins and sustainability and we were a little disappointed about the lack of great innovation of some exhibitors on these subjects compared to the previous years.
But at least some of them are trying to attract people on their booth with childhood references !
This week, there is the Laval Virtual event which is dedicated to VR / AR. I will be there on Thursday and I will give you my thought about it.
The Autodesk Platform Service – APS (formerly Forge) Viewer has a built-in extension to take measures of 2D and 3D models.
Sometimes, you can have a model or a sheet with inconsistent units ending up with wrong measure values. So a calibration tool is allowing you to set the right length between two points. It defines a scaling factor applied to all measures.
How to make it persistent?
Here is some tips to get the current calibration, save it and then set it when the viewer loads.
Access to the measure extension.
For that, we can wait for the EXTENSION_LOADED_EVENT and check if the extension id is Autodesk.Measure to be sure that the extension is loaded.
viewer.addEventListener(Autodesk.Viewing.EXTENSION_LOADED_EVENT, function(event){
  if(event.extensionId === 'Autodesk.Measure')
  {
    //Now we are sure that the extension is loaded
  }
});
This tool provides valuable methods and we are going to use these three.
// Return the calibration unit
calibrationTool.getCurrentUnits();

// Return the current factor
calibrationTool.getCalibrationFactor();

// Modify the calibration factor value
calibrationTool.setCalibrationFactor([NEW SCALE FACTOR])
React to calibration event
We don’t want to get the last calibration manually, so we can subscribe to the event emitted when you finish a calibration.
     viewer.addEventListener(Autodesk.Viewing.MeasureCommon.Events.FINISHED_CALIBRATION, function(calibration){
    // Now we have the latest calibration factor so we can store it
});
Making an extension to save calibrations and set the latest
Now that we have all the functions we need, let’s create an example to demonstrate this.
First, we will create a custom viewer extension with a button in the toolbar. As I want to add some UI, this extension is going to open a panel to display our calibrations values and some action buttons:
For now, we only have a simple extension with a toolbar button that opens a UI panel. Let’s add some logic to it.
As explained before we can subscribe to the FINISHED_CALIBRATION event, to get the latest calibration and make a request to the server to store it in database. For this example, I am using a simple text file, but it can be easily improved with a database.
We can use the docking panel to display current values, show the different calibrations that we got from our database and implement actions in our interface.
Take a look at my demo below. I change the calibration factor from previous calibrations with a fresh new calibration and we see the measure difference. Everything done here in this 3D view will work the same in a 2D view.
The complete code of this example is available on my github.
7530km, 3 flights and over 20 hours of travel … this is where our journey to AU started !
After 2 years of virtual AU waiting for the opportunity to take part of this event, time as come and not least because the class I proposed a few months ago has been selected !
Doing my first AU as main speaker was a fantastic chance. All the work to prepare our talk during the summer will finally be presented.
But first let’s enjoy New Orleans … so warm and humid when we left the airport ! Discovering this city mixing old and new building style was really great, from Central Busines District to Audubon Park by the famous French Quarter.
Audubon Park
Royal Street in the French Quarter
Old style tramway in CBD
We also took a tour to see alligators in the Bayou. A lot of fun to ride on this airboat.
Across the Bayou on airboat
Baby gator
Time was running and it was already time for the event ! Our Tuesday was really intense. We had no time between our classes and we met a lot of people. So interesting and so exhausting …
Convention Center entry
A very great class with our friends from DBLab and their customer
No rest on Wednesday morning, we woke up at 5am for the 5K Fun Run. That wasn’t very easy as we are not trained and not used to wake up so early, but running along the Mississipi with the sunrise was wonderful.
5K Fun Run starting line
Just enough time to go back to the hotel, take a well deserved shower and I was back to the Convention Center to prepare my class.
A huge amount of stress before starting, but I felt really good during the presentation and all went great.
A little stressed waiting to start
Alex, Brian and Michael
Quite a lot of people
Our talk was about point cloud with Forge. I was sharing this class with Brian Nickel (AlliedBIM) and Michael Beale (Autodesk). After Brian introduced why point clouds is a great value added in BIM workflows, Michael showed how Autodesk implements point clouds in BIM360 and Forge using 3D-tiles to support large point clouds visualization.
In my presentation, I explained a way to create a simple point cloud using the last iPad Pro Lidar and ARKit technology to get spatial data.
Reality Capture preparation
Then we described how we are able to integrate it into the Forge Viewer and how we used Forge DesignAutomation to automate a Revit plugin that import the point cloud and align it with the CAD model.
Point cloud integration in Forge Viewer
Point cloud integration in Revit
Our class ended with a Q&A which was a great moment of exchange with the attendees.
Wednesday afternoon we participate to the Forge System Integrators meetup organized by Sanjana Chand (Autodesk) where we had a good opportunity to present us to others SI and people interested to meet us.
We finished this day at a private Forge reception with a live Jazz Band. It was a nice moment having fun and discussing with other Forge fellow and team members.
Jazz band at Gordon Biersch
Tuesday morning started with a third Forge event, a private breakfast with some Autodesk Forge leaders sharing vision of future for Autodesk Platform Services – yes this is the new name of Forge and the name we must use from now.
After two intensive days, we had a less busy day to finish this event, having only two classes such as the excellent one done by Jaime Rosales (and prepared by Denis Grigor) about the new DataExchange API. We already had a quick presentation in June during the Forge Data days in Barcelona and everything was so confusing at this time. This class helped me to better understand the different ways to use this API some some good examples. Good job ! 😉
Jaime presenting his class about DataExchange API
Thursday evening took place “La Grand Soirée” which was the final party of the AU. There was some funny games in the hall and great band playing inside and oustide.
La Grande Soirée entrance
Unfortunatly, those who already been to AU in Las Vegas seemed a little bit disappointed about this party missing some energy and maybe some decoration (espacially for a Mardi Gras style party). But it was great to celebrate the end this event for everyone. We met some of them at the Cafe Negril, a good bar we found in the Frenchman street which seems to be where locals usually hangs out.
Friday morning, Katinka Sante and Maureen Higgins organized a cruise on the Mississippi river with the Autodesk Community and some Experts Elit. Cruising on the Paddlewheeler boat Creole Queen with this beautiful weather was perfect to conclude this trip and see the city from another point of view. Thanks to them for this tour.
Paddlewheeler riverboat Creole Queen
New Orleans from the Mississippi river
We had a few hours to bring back some souvenir and taste one more authentic gumbo and it was already time to flight back home.
Canal Street
We really enjoyed this trip to New Orleans and the Autodesk University event. We made great connections with new people and were happy to see face to face people we had only met through video calls. Of course, strengthening relationships with those we had not seen from a while.
This week took place the 3rd Autodesk Forge Hackathon. The past two years we were tempted to participate but renounced because of lack of time. This year, no more waiver, let’s do it !
Really good prizes will be gifted to winners of the following six challenges :
With our spirit of childhood, we decided to compete for the 3D game challenge. Our objectives were first to use most of Forge API / built-in functions as it’s one of the judging criteria and also to push limits of APIs.
The week started with a fun meeting with others teams and Autodesk staff in Gather Town for the pitch day, Sanjana suggested our team name, guess what ? We named this blog after that : PIROmancy.
Twitter @AfroJme
Here’s the draft of our game concept :
The idea was to create an isometric view game using the Viewer Forge (which is based on three.js R71). Most of the components we used came from the DataVisualization API toolkit :
SurfaceShading for the floor heatmap
Sprites for the gems
Streamline for the tornado and track the player path
The first step was to transform Forge into ‘game engine’ and it was pretty straightforward using the ToolInterface. The ToolController already implements an update function and keyboard events. Now let’s add some physics (we only need collisions for this game), and thanks to Detecting-collisions-in-the-forge-viewer and Integrating-ammojs-physics-with-autodesk-view-data-api we were able to quickly integrate Ammo.js in Forge.
Moving the player in the model with collisions
Second step, we can play with the DataVisualization API toolkit. For the floor heatmap, we created a grid of sensors with random values. Using linear interpolation between values with updateShadingSurface function, we ended with this nice effect.
Floor is lava effect
The tornado effect was made with Streamlines and gems were made using Sprite viewable API.
Streamline tornado
Gems made with sprite viewables
At this point, we had all the key elements to create our game. We spent all our remaining time to implement the game logic, change the Revit input model for a much appropriate one, replace player with a 3D glTF character, add sounds effect and music, and finally some UI improvements.
Thursday afternoon we stopped developing the game to prepare the demo and slides for Friday.
Game demo
Now we are waiting for the results which should be announced during the Autodesk Universities. We hope this game pleased the judge.
No time for rest, we need to prepare our travel to New Orleans for AU2022 !!
Welcome to the PIROmancy blog. You will find soon where this name come from.
Never too late to start something, we decided to tell more about our work as software developers. We? Let me introduce ourselves…
I’m Alexandre Piro, I work for Piro CIE a company we created with my brother Charles and our father Thierry.
Since 2016, we develop plugins for Autodesk products such as Revit, Navisworks and Autocad. We are part of the Autodesk Developer Network.
Our main research were focused on Augmented and Virtual Reality to work with CAD / BIM models outside of editors.
Therefore, we started to use Autodesk Forge in 2017 as a perfect link between desktop products and XR. We became Autodesk Service Provider, then recognized as Autodesk Forge Certified System Integrator.
We will use this blog to share technical information about our work, describe events we participate in and coding tips.